Understanding the evolution of data storage and retrieval technologies can feel like navigating a maze of innovation and advancements. One such pivotal component that has played a crucial role in the transition from bulky data storage systems to sleek modern devices is the optical drive. This guide will demystify what an optical drive is, delve into its operational intricacies, and provide practical examples for its modern applications. Let’s embark on this informative journey, focusing on how optical drives fit into today’s technology landscape.
Introduction: What Is an Optical Drive?
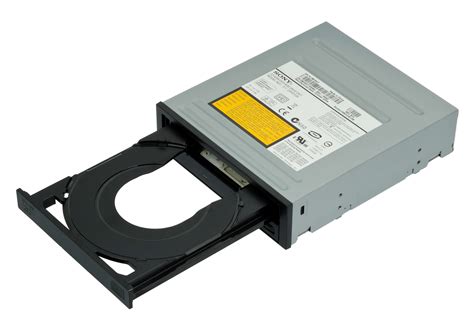
An optical drive is a device that reads data from optical discs such as CDs, DVDs, and Blu-rays using a laser. This technology, which first emerged in the 1980s, revolutionized how data is stored and accessed. While today’s world leans heavily towards cloud storage and USB drives, optical drives still serve vital functions in specific scenarios. Understanding their capabilities and limitations is essential for anyone working in fields that involve media production, data archiving, or even gaming.
Imagine you’re a filmmaker or a game developer needing to back up large volumes of data. Traditional hard drives might not always be feasible due to their cost or physical size. Here’s where optical drives step in. With their ability to store and retrieve data in large capacities, optical drives remain indispensable for specific professional applications.
Despite the emergence of new technologies, optical drives offer advantages that some other forms of data storage cannot. They are durable, cost-effective for long-term storage, and can hold vast amounts of information. For instance, archiving entire film projects or large datasets in optical formats can be both cost-effective and reliable over the long term.
Quick Reference
Quick Reference
- Immediate action item with clear benefit: Backup critical data using DVDs for long-term data storage.
- Essential tip with step-by-step guidance: To use an optical drive, insert the disc and press play or the ‘read’ button on your device.
- Common mistake to avoid with solution: Confusing optical drives with USB drives; ensure the disc type matches your drive’s capability (e.g., Blu-ray versus standard DVD).
Detailed How-To: Using an Optical Drive
To harness the full potential of an optical drive, it’s essential to understand how to use it effectively. Below, we’ll provide a detailed guide on setting up, utilizing, and troubleshooting optical drives.
Setting Up Your Optical Drive
Before you start using an optical drive, ensure you have the following setup ready:
- A compatible optical drive (CD/DVD/Blu-ray).
- A compatible power source.
- Proper installation in your computer or standalone media player.
Here’s a step-by-step guide:
- Installation: If you’re installing an internal optical drive, connect the power and data cables correctly to the drive and your computer’s motherboard. For external drives, plug them into a USB port.
- Software: Ensure you have the right drivers installed. For internal drives, these are often integrated; for external drives, download the necessary software from the manufacturer’s website.
- Power On: Plug in and turn on your device. Ensure it recognizes the optical drive by checking the device manager or using the manufacturer’s software.
Inserting and Reading Discs
Inserting a disc into an optical drive is straightforward. Here’s how:
- Open Tray: Depending on your optical drive, you might press a button to open the tray or use an eject command from the software.
- Insert Disc: Place the disc on the tray carefully with the label facing up. Close the tray.
- Read Data: Once the disc is inserted, your device should automatically start reading the disc. If not, you might need to manually start the process through your media player or operating system.
Advanced Use: Ripping and Burning Discs
One of the most powerful features of optical drives is the ability to rip and burn discs. Below is a detailed guide on how to do this:
Rip a CD or DVD:
- Software: Use software like Windows Media Player or Exact Audio Copy (for more control over the rip process).
- Insert Disc: Place the CD or DVD into the optical drive.
- Initiate Rip: Open your chosen software, select the disc, and start the ripping process. Ensure to save the files in your preferred format (MP3, WAV, etc.).
Burn a CD or DVD:
- Software: Use burning software such as Nero, Roxio, or built-in tools like Windows Media Player.
- Insert Blank Disc: Insert a blank CD or DVD into the optical drive.
- Select Files: Open the burning software and select the files you wish to burn. Arrange them in the desired order.
- Start Burn: Initiate the burning process. Follow the software prompts to complete the burn.
Practical FAQ
How can I tell if my optical drive is working correctly?
To ensure your optical drive is functioning correctly, follow these steps:
- Test with Different Discs: Try different CDs, DVDs, or Blu-rays to rule out any disc-specific issues.
- Check for Errors: Look for any error messages when reading discs. This can indicate hardware or software issues.
- Software Check: Use disk-checking software to diagnose any read/write errors.
- Listen for Sounds: When reading or burning discs, you should hear the disc spinning up and operating. If there’s silence or unusual sounds, it might indicate problems.
These practical steps and tips should give you a solid foundation for understanding and utilizing optical drives. Despite the surge in digital storage methods, optical drives remain a reliable choice for specific, high-capacity data storage and retrieval needs. From archival purposes to media production, optical drives offer a dependable technology that continues to serve essential functions in today’s world.